In this lesson we will learn how to install
Requirements
-
Vmware networks must be configured - link
-
Pfsense must be configured correctly and running - link
( Just follow till you have a working pfsense and skip the docker part)
If you are on oracle virtualbox, you can follow this guide - link
Prerequisites
- Download the official debian full dvd iso - link
Installation
Debian
Make sure pfsense is running in the background
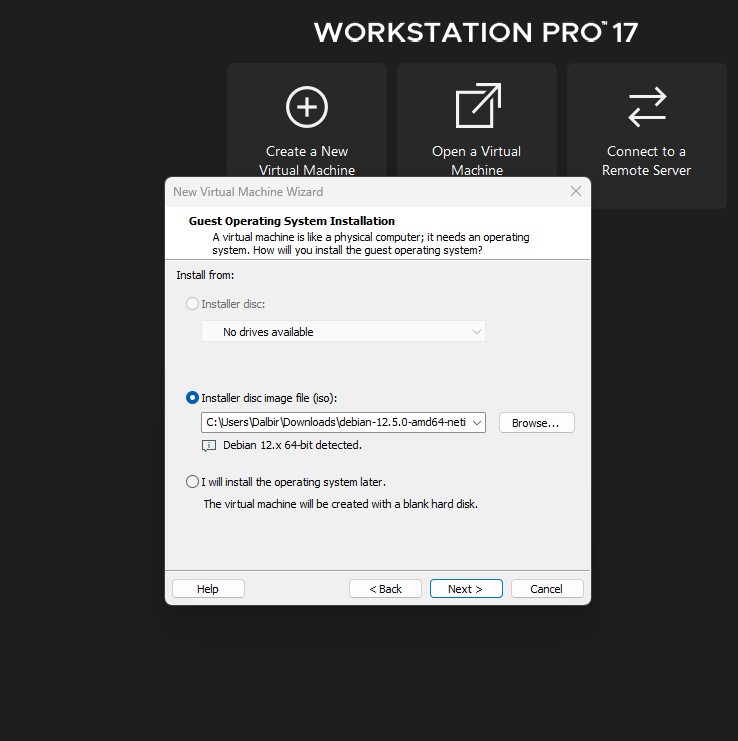
- Click on create a new virtuam machine
-
Choose typical and next
-
Choose the downloaded iso file

-
Name your vm
-
Choose the size - 20gb plus recommended
-
On hardware tab, click customize and change
- You can keep the defaults for Memory, Processors
- On Network Adapter tab - change to VMnet1 (Host Only) if you are following my guide or the adapter you configured for host-only with pfsense.
- Click close to save
-
And Finish
-
Start your debian machine and follow the instructions
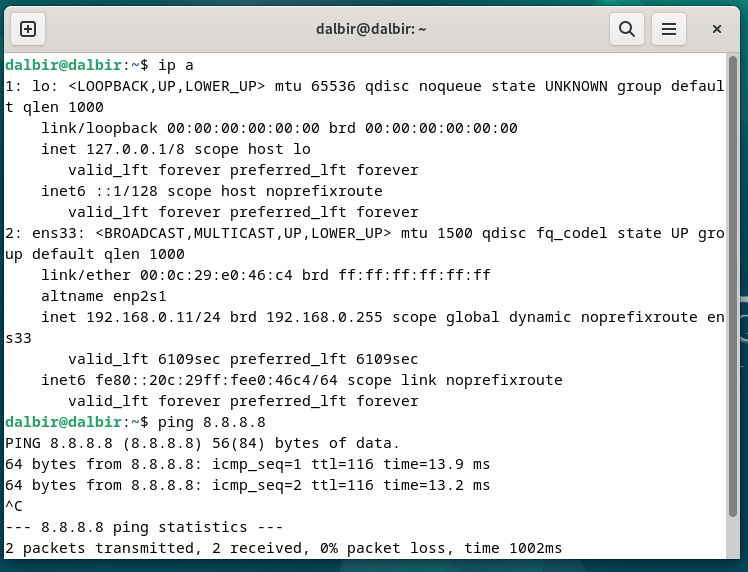
Restart the machine and now we will check our connection :
Launch the terminal and check your ip and try to ping google

Everything should work perfectly if you are following my guide.
Root privileges
su
# root password
sudo usermod -aG sudo your-username
newgrp sudo
Use Apt
sudo nano /etc/apt/sources/list Copy this into the file
deb http://deb.debian.org/debian/ bookworm contrib main non-free non-free-firmware
# deb-src http://deb.debian.org/debian/ bookworm contrib main non-free non-free-firmware

deb http://deb.debian.org/debian/ bookworm-updates contrib main non-free non-free-firmware
# deb-src http://deb.debian.org/debian/ bookworm-updates contrib main non-free non-free-firmware

deb http://deb.debian.org/debian/ bookworm-proposed-updates contrib main non-free non-free-firmware
# deb-src http://deb.debian.org/debian/ bookworm-proposed-updates contrib main non-free non-free-firmware

deb http://deb.debian.org/debian/ bookworm-backports contrib main non-free non-free-firmware
# deb-src http://deb.debian.org/debian/ bookworm-backports contrib main non-free non-free-firmware

deb http://deb.debian.org/debian-security/ bookworm-security contrib main non-free non-free-firmware
# deb-src http://deb.debian.org/debian-security/ bookworm-security contrib main non-free non-free-firmware
Continue to docker installation
Docker
Before you install Docker Engine for the first time on a new host machine, you need to set up the Docker apt repository. Afterward, you can install and update Docker from the repository.
⭐ You can follow the official guide here for troubleshooting :
https://docs.docker.com/engine/install/debian/
Video guide :
- Set up Docker's apt repository.
# Add Docker's official GPG key:
sudo apt-get update
sudo apt-get install ca-certificates curl
sudo install -m 0755 -d /etc/apt/keyrings
sudo curl -fsSL https://download.docker.com/linux/debian/gpg -o /etc/apt/keyrings/docker.asc
sudo chmod a+r /etc/apt/keyrings/docker.asc

# Add the repository to Apt sources:
echo \
  "deb [arch=$(dpkg --print-architecture) signed-by=/etc/apt/keyrings/docker.asc] https://download.docker.com/linux/debian \
  $(. /etc/os-release && echo "$VERSION_CODENAME") stable" | \
  sudo tee /etc/apt/sources.list.d/docker.list > /dev/null
sudo apt-get update
If you use a derivative distro, such as Kali Linux, you may need to substitute the part of this command that's expected to print the version codename:
(. /etc/os-release && echo "$VERSION_CODENAME")Replace this part with the codename of the corresponding Debian release, such as bookworm.
- Install the Docker packages.
sudo apt-get install docker-ce docker-ce-cli containerd.io docker-buildx-plugin docker-compose-plugin- Verify that the installation is successful by running the
hello-worldimage:
sudo docker run hello-worldThis command downloads a test image and runs it in a container. When the container runs, it prints a confirmation message and exits.
You have now successfully installed and started Docker Engine.
Now we will create a docker group to run docker commands withouts sudo
sudo groupadd docker
sudo usermod -aG docker $USER
newgrp docker
Verify that you can run docker commands without sudo.
docker run hello-worldPfsense
Since our pfsense is already configured, we will use it to enable ssh to access from our new vm
Enabling SSH in pfsense
In the terminal of pfsense, just type 14 to enable sshd.
Now on our debian we will just type
ssh admin@192.168.0.1 It will ask you to type yes to accept the fingerprint and your pfsense password which you use to connect in webbrowser. After typing it, you will be connected to pfsense.